
Introduction & Process
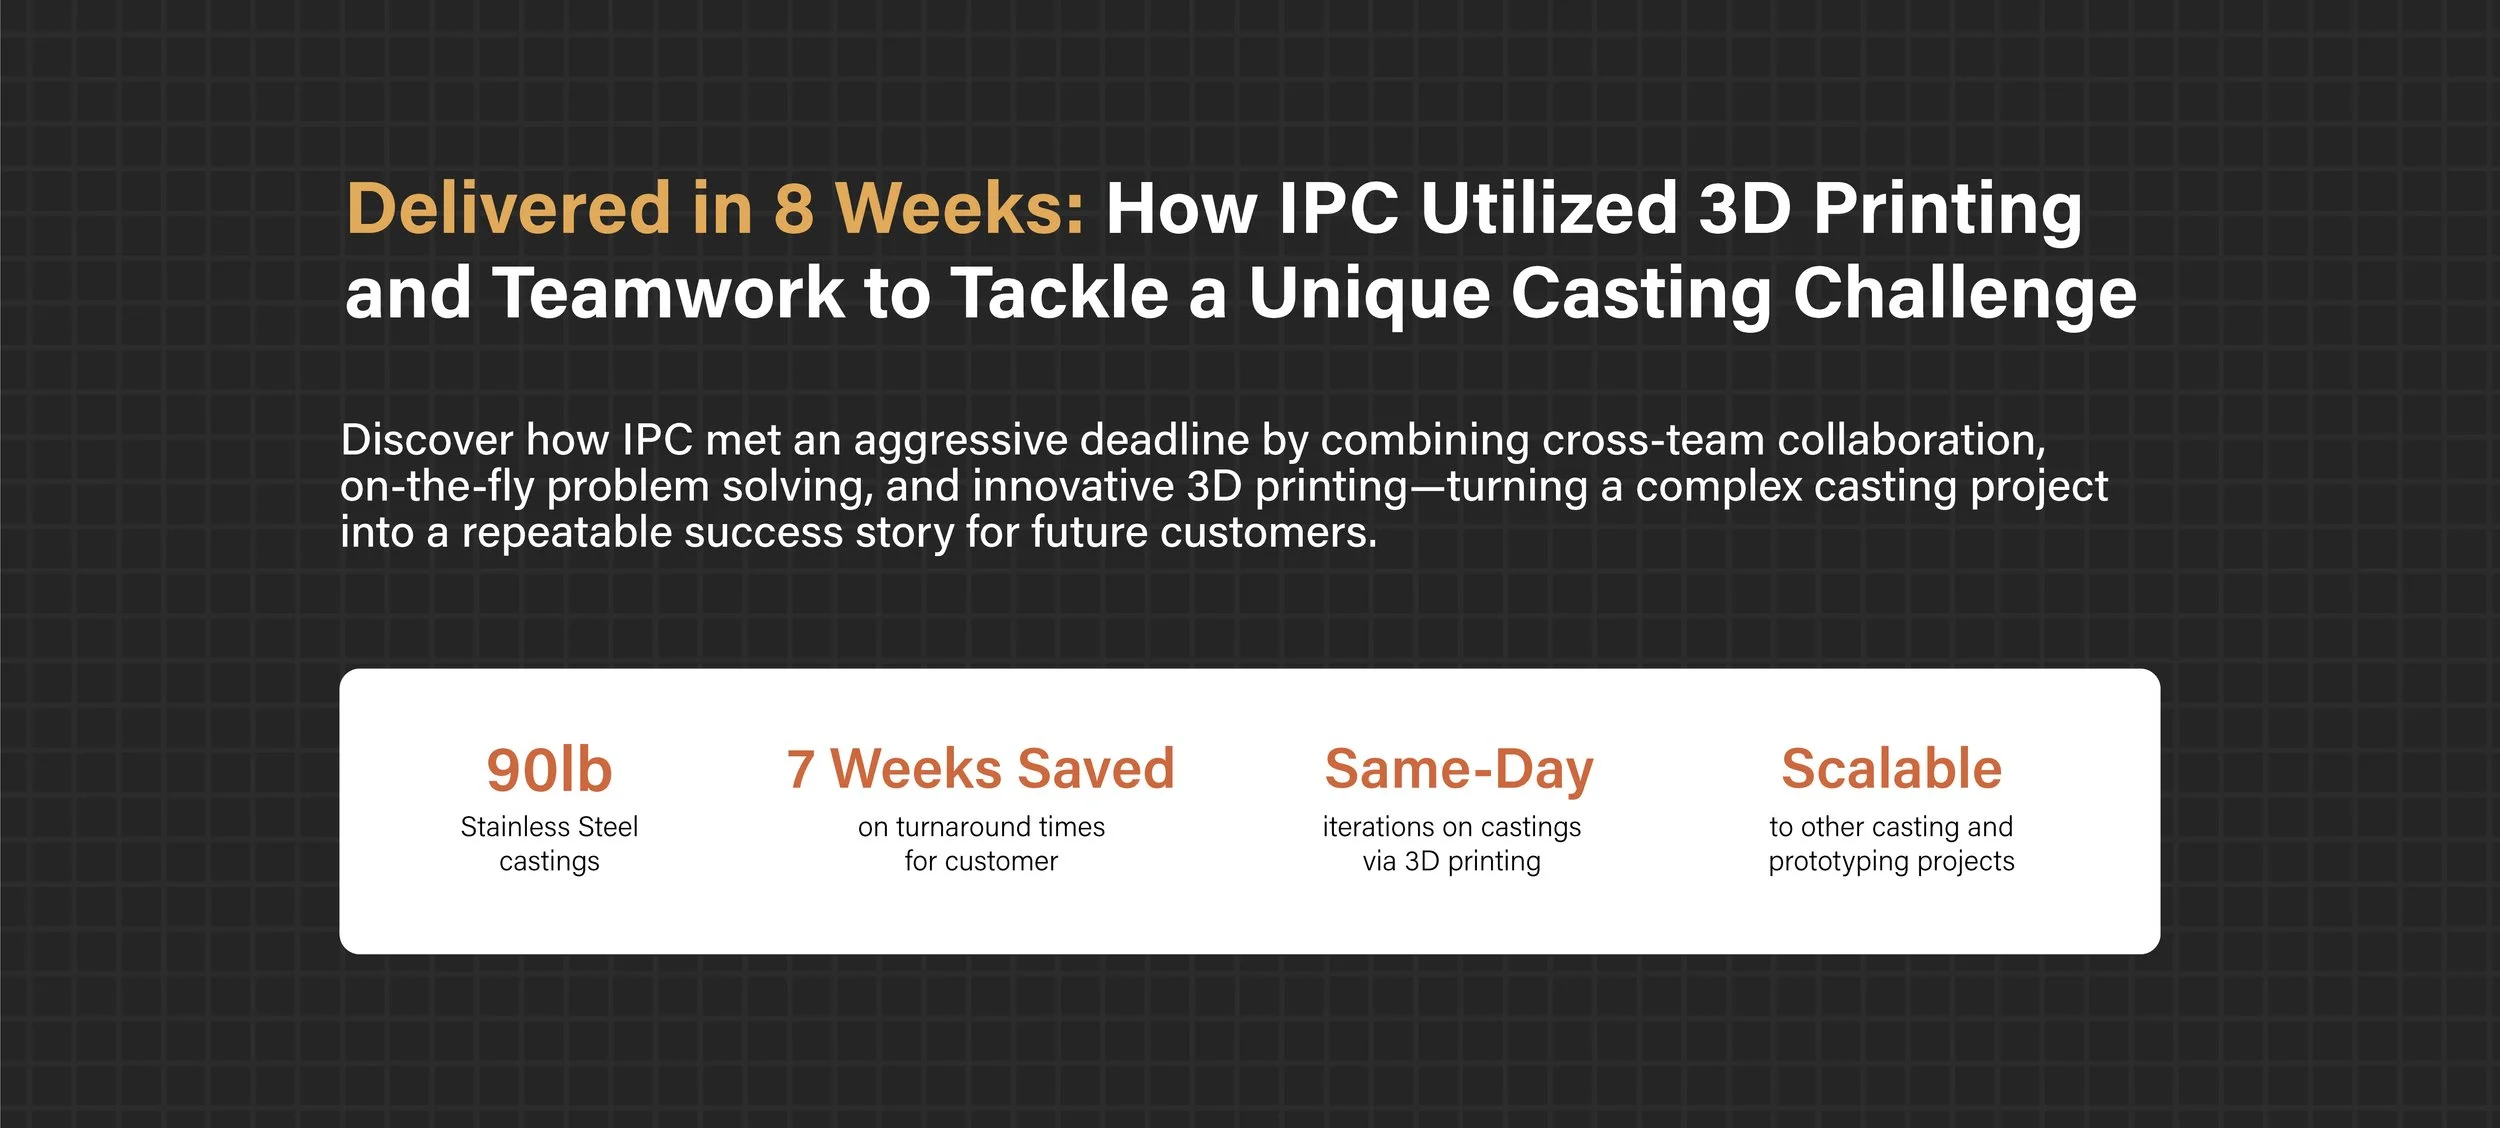
Recently, IPC Foundry Group undertook a unique production challenge, casting 16 sets of 90-pound 304 stainless steel gearboxes for a customer in a new industry, in just 8 weeks. Castings of this size push the boundaries of what we typically handle, and with such a quick turnaround time, there was little room for error.
In this case study, we’ll take a look under the hood to see how our team leveraged decades of experience, innovative 3D printing, and constant collaboration to rise to the occasion and deliver on an ambitious project with an expedited timeline. You’ll hear from several team members throughout this article as they explain preproduction, testing & troubleshooting, and the production cycle at IPC.
However, before we get into the project, it's essential to review the investment casting process to demonstrate how we successfully sidestepped traditional tooling, as well as provide a framework for the work we did, the obstacles we encountered, and the solutions we implemented throughout production. Let's get into it!
The Investment Casting Process
Step 1: Quoting, Preproduction, and Onboarding:
A lot of work happens before casting can begin. During this stage, sales personnel and engineers will consult with customers to get a firm understanding of the project and finalize quotes. At the same time, other departments are consulted to evaluate the project, determine if investment casting is appropriate (as opposed to another production method), and, once an order is official, prepare for casting work.
Step 2: Tooling
Traditionally, investment casting utilizes tooling to produce wax patterns. Think of tooling like a muffin tin; once the mold is in place, you can bake hundreds or even thousands of identical muffins. Similarly, foundry teams use tooling to consistently replicate wax patterns that serve as the blueprint for your final casting. Tooling can be expensive and can take a significant amount of time (more on that later).
Step 3: Wax Patterns & Gating
With tooling completed, the production team will create highly accurate wax replicas of your part (called wax patterns). These are subsequently attached to gating systems (which are custom configured to your part) that allow for a consistent flow of metal during pouring and thereby quality, on-spec parts.
Step 4: Ceramic Shell Formation
Wax patterns from the previous step are dipped in a slurry to form a shell for metal pouring. Parts are typically dipped and dried multiple times to achieve a shell thickness adequate for near-net metal forming.
Step 5: Burnout/Dewaxing
Ceramic shells and the wax patterns they cover are superheated (commonly via flashfire system or autoclave) to remove wax and residual material from inside the shell. Once the shells are hollow and have solidified, they are staged for metal pouring.
Step 6: Metal Pouring
Shells are placed into furnaces where they are superheated to prevent thermal shock/failures and achieve consistent results during metal pouring. Your alloy of choice is heated in a furnace and then introduced into the shell, creating a near-net casting.
Step 7: Finishing & Secondary Operations
Parts solidify, shells and gate systems are removed, and castings receive additional finishing operations to prepare them for market. Work can include machining, heat treating, upgrading, painting, non-destructive testing, and a host of other processes a part needs to perform.
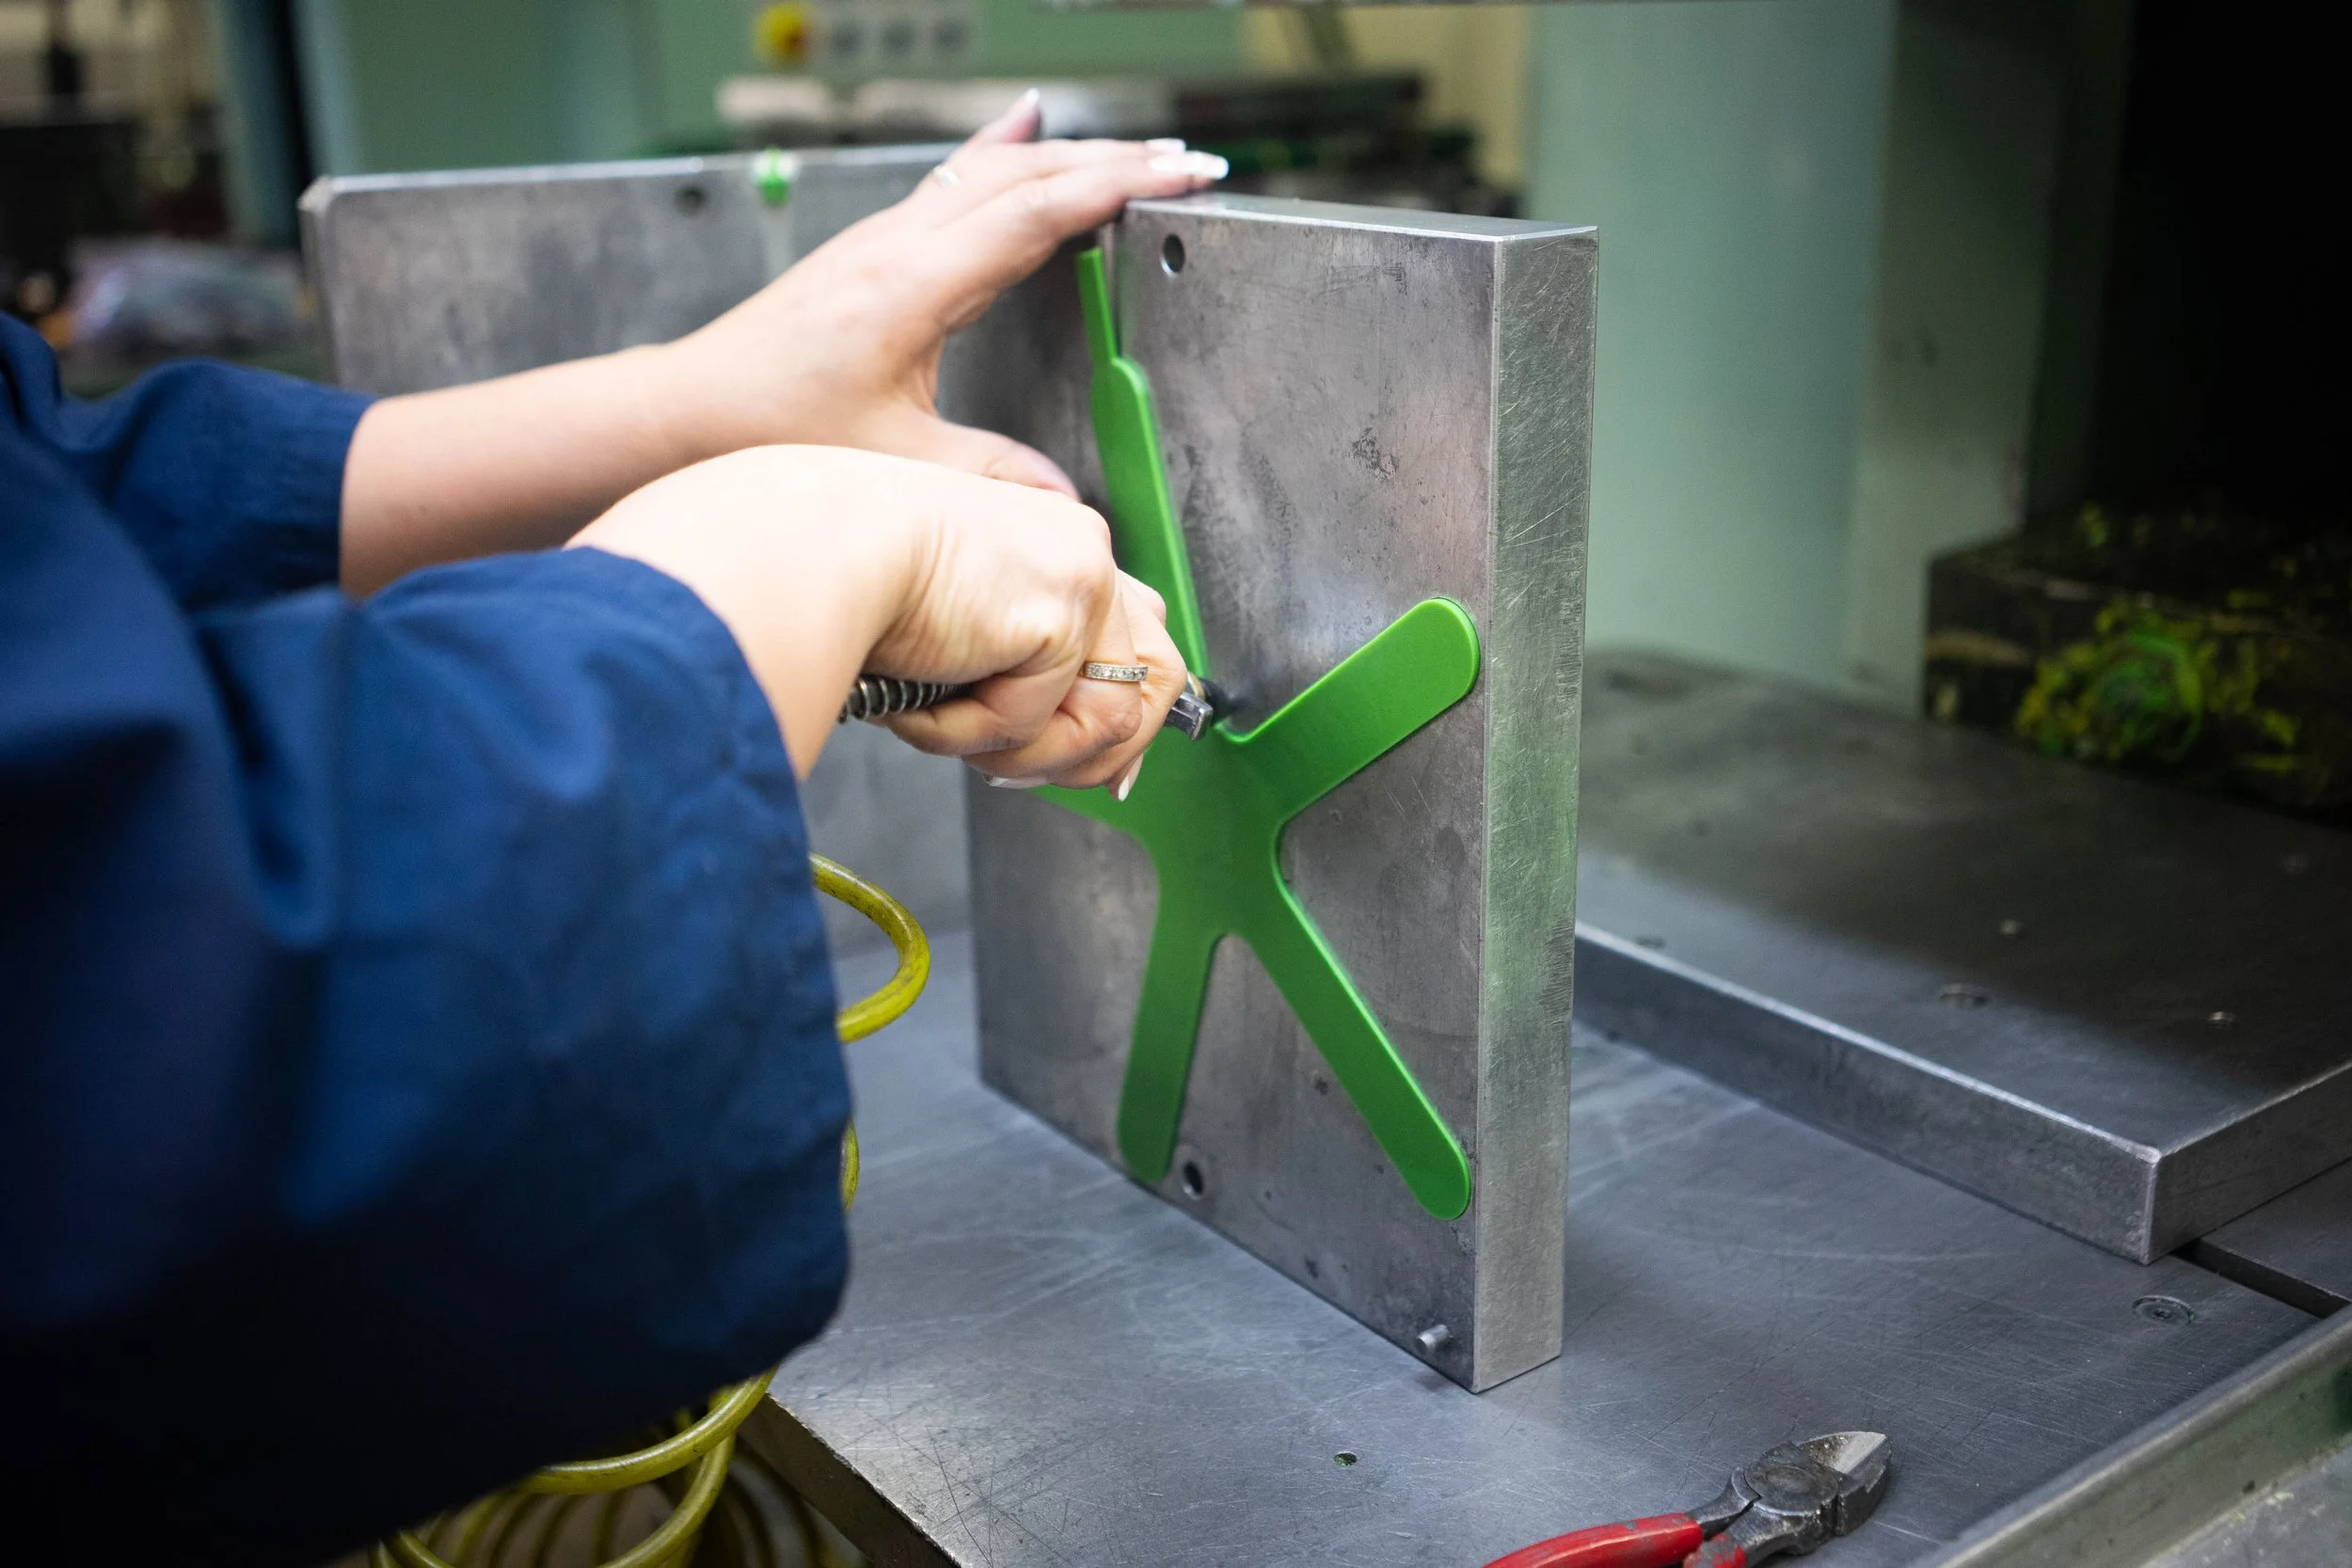
A wax pattern being removed from tooling.
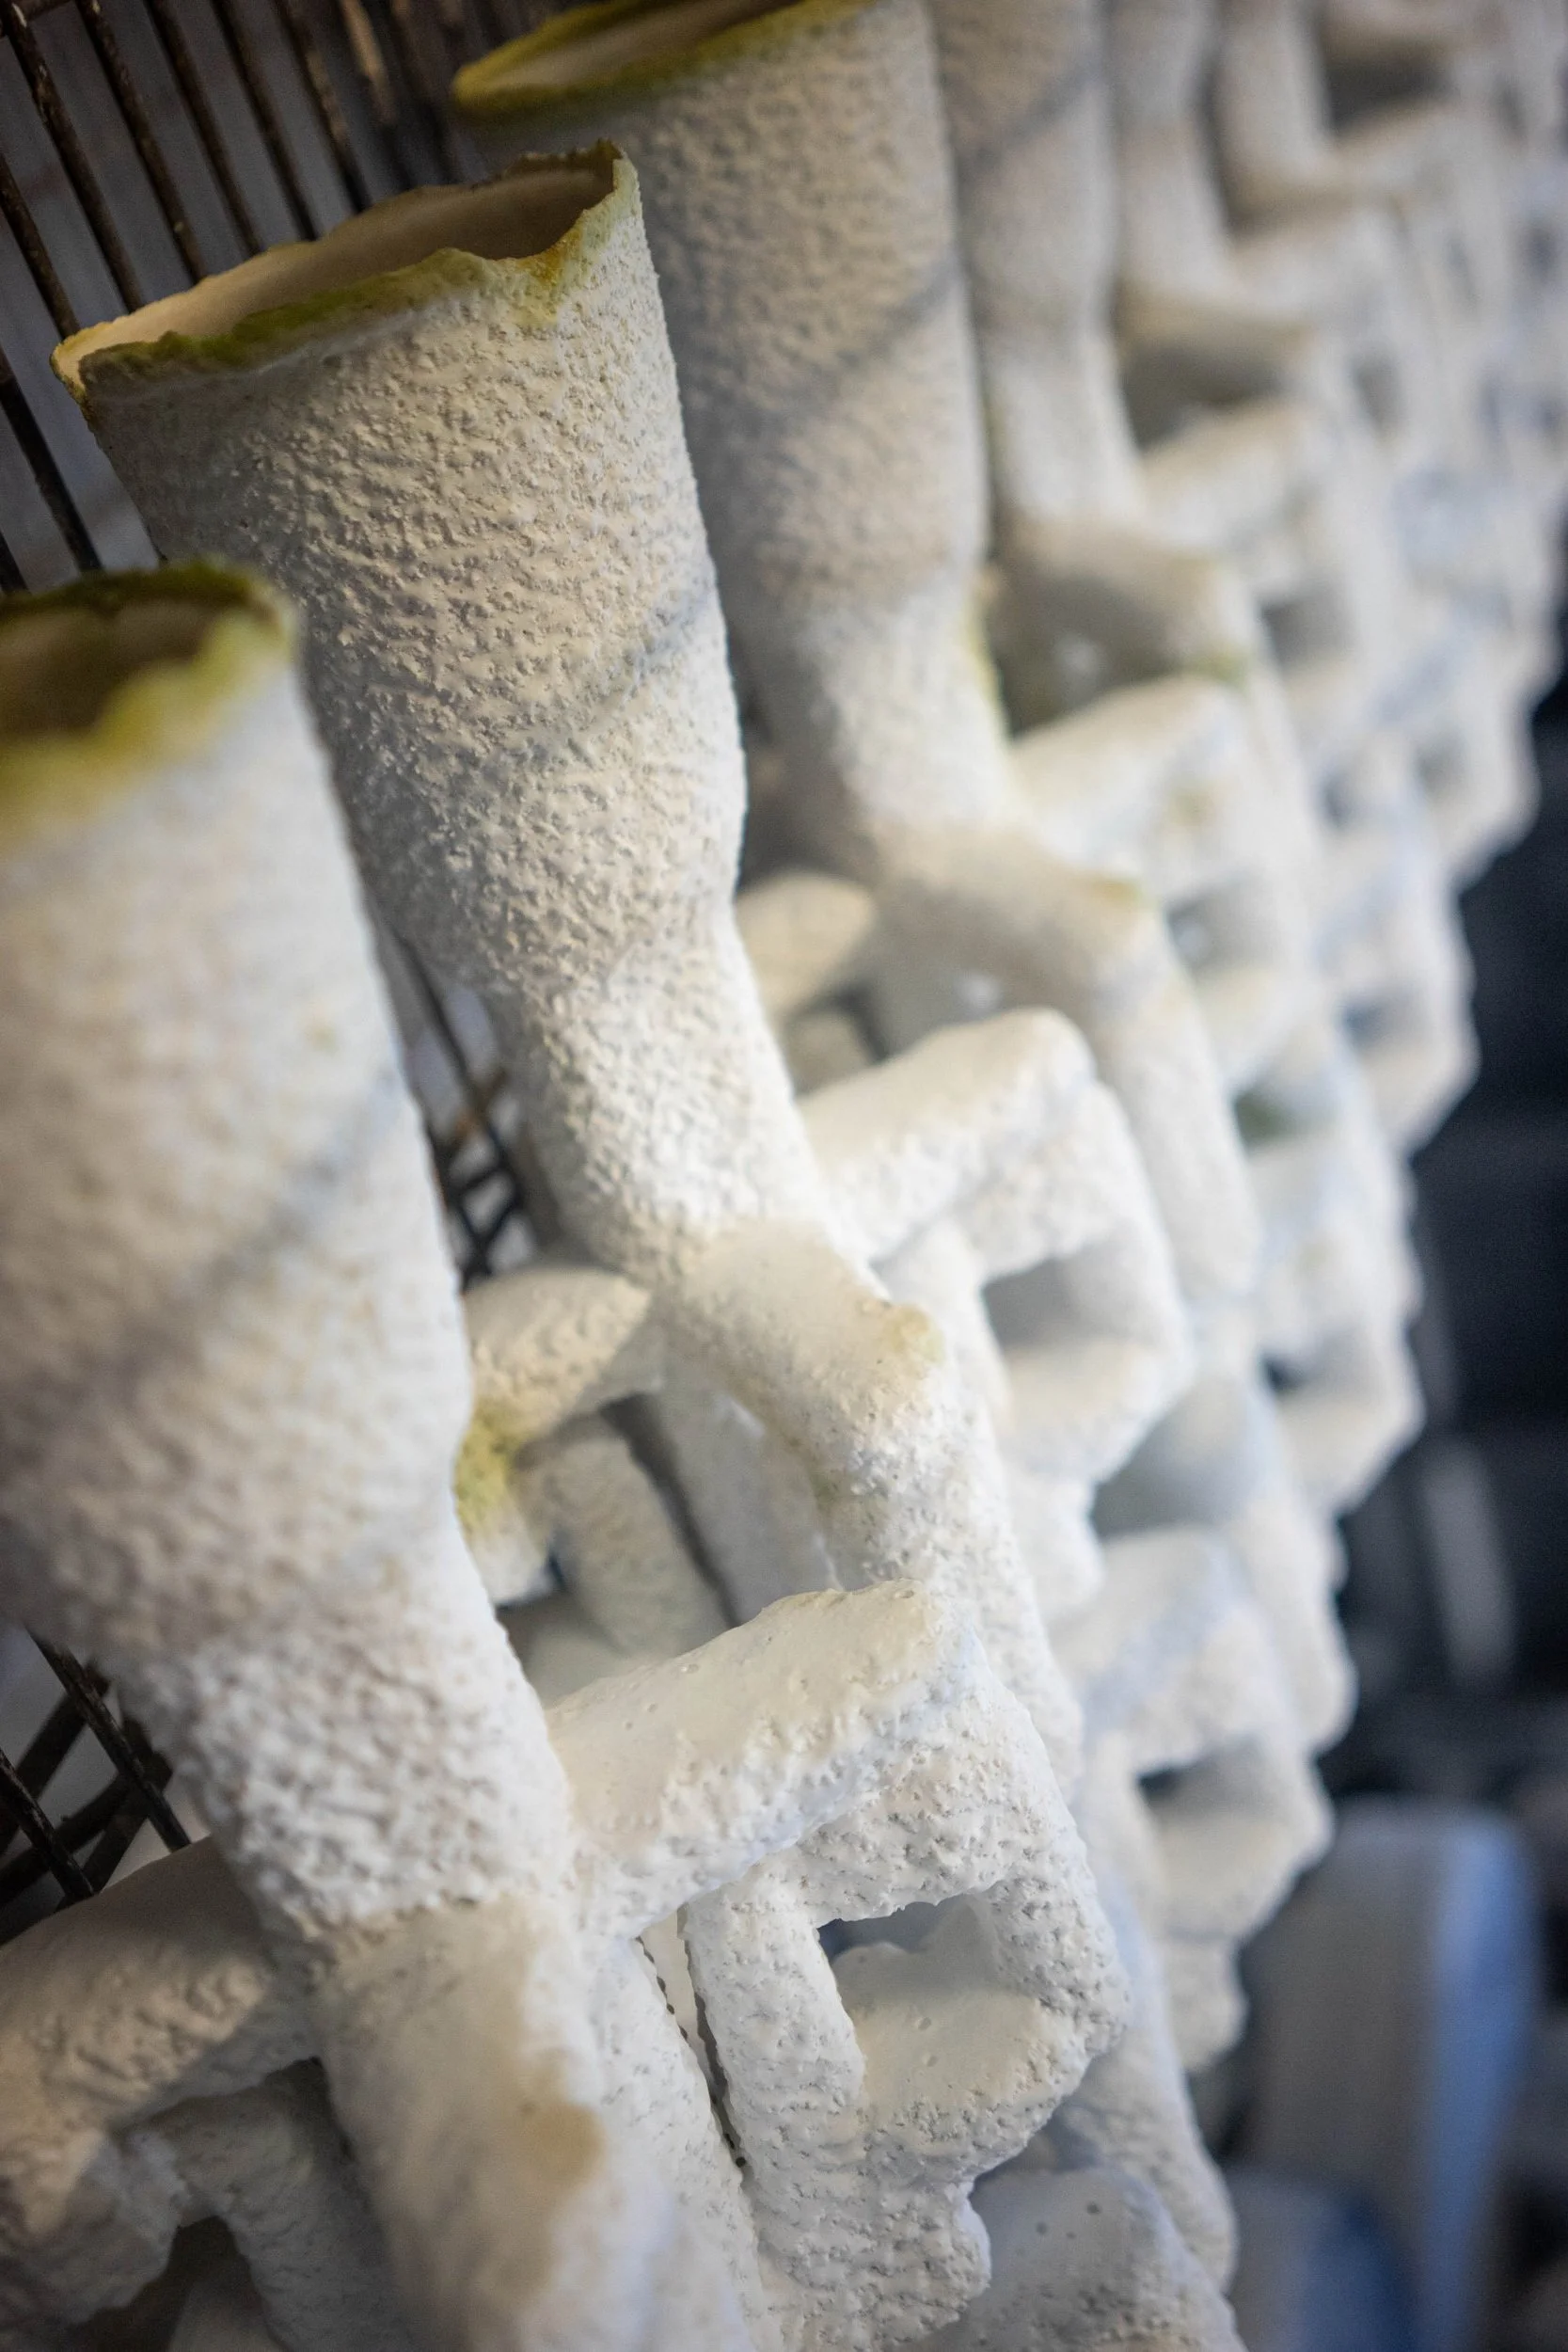
Hollow shells staged for pouring.
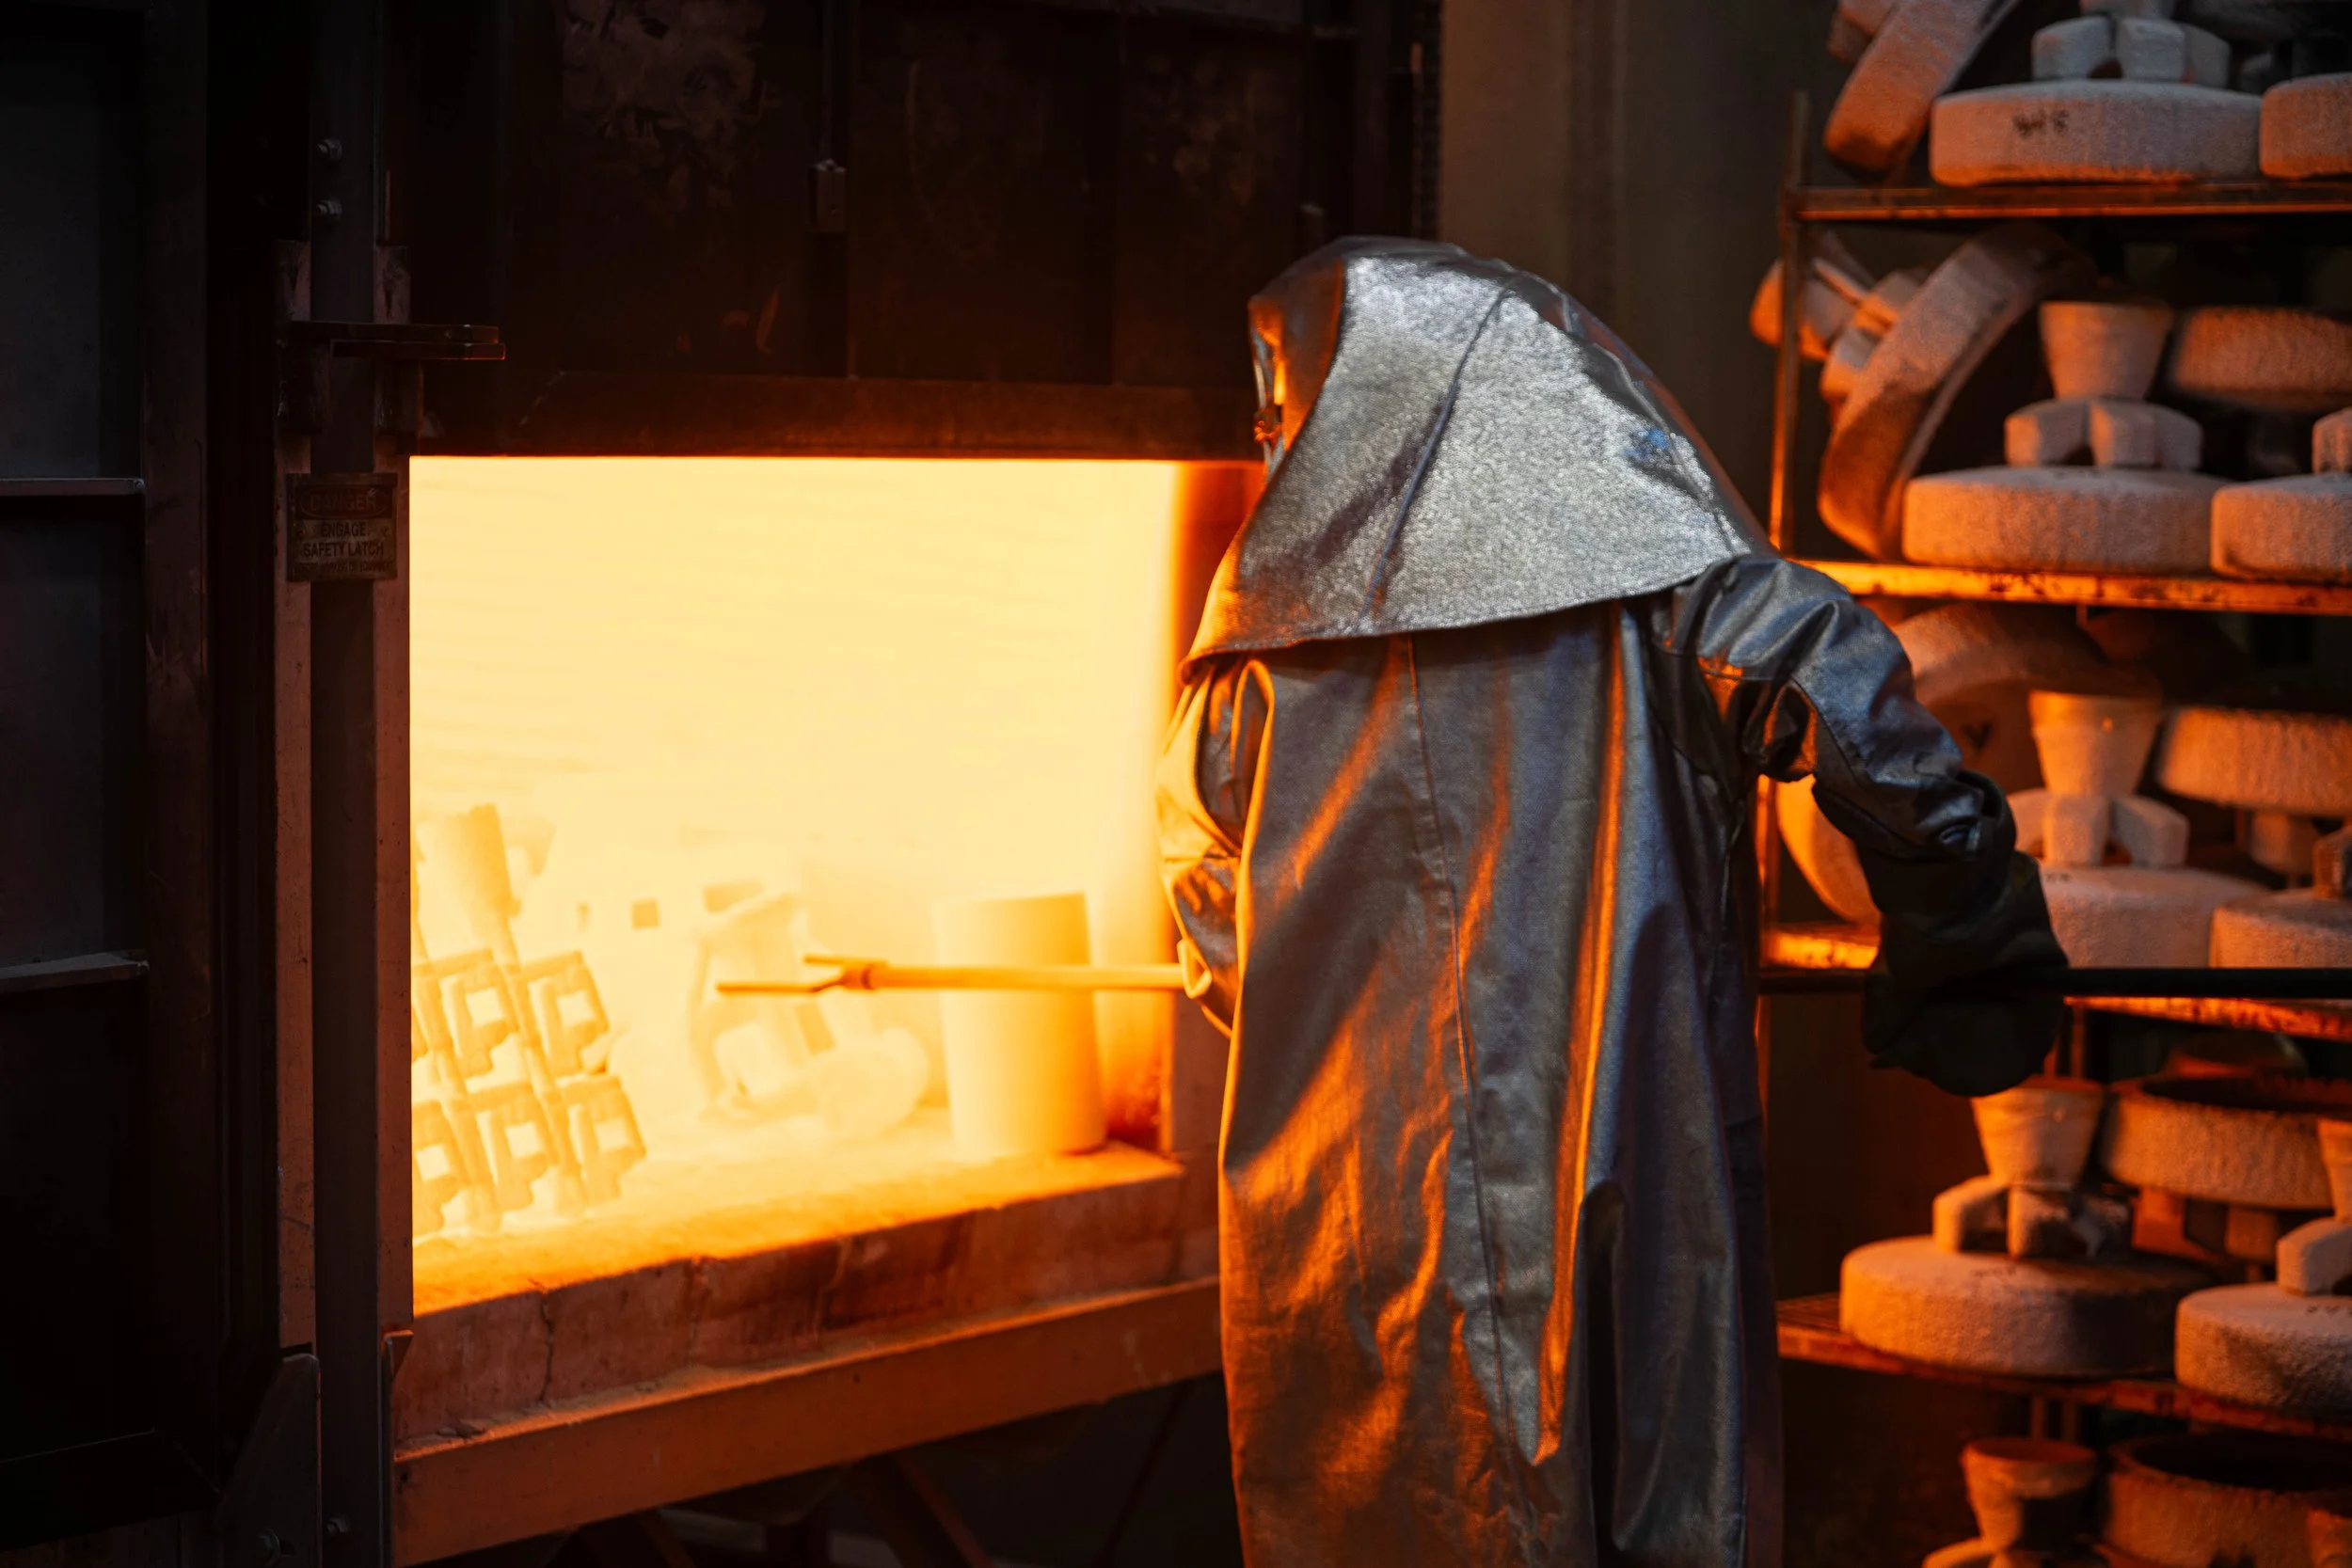
Shells in a furnace, super-heated for pouring.

Freshly poured metal in shells, soon to solidify into castings.

The Project & The Greenlight
Pre-Production & Quoting
A customer approached IPC with a request to produce a series of ~90lb stainless steel gearboxes. A competitor had quoted a 12-week lead time for the castings, plus an additional 3 weeks for tooling—a total of 15 weeks for the project.
As with any potential project, our sales, engineering, maintenance, and production teams roundtabled to evaluate the project's feasibility, draft a game plan, and prepare a quote. Initially, there was some hesitation. Castings over 80 pounds fall a bit outside our typical production range at IPC. Larger parts require larger furnaces, crucibles, and careful planning around how we lift and move heavy molds and casts throughout the facility.
We had larger furnaces, crucibles, and equipment on hand, but to take on the job, we'd need to reconfigure the foundry. On top of installation, we'd need to perform preventive maintenance to ensure quality control and implement safe lifting systems to move the part through each production phase. It wasn't going to be easy.
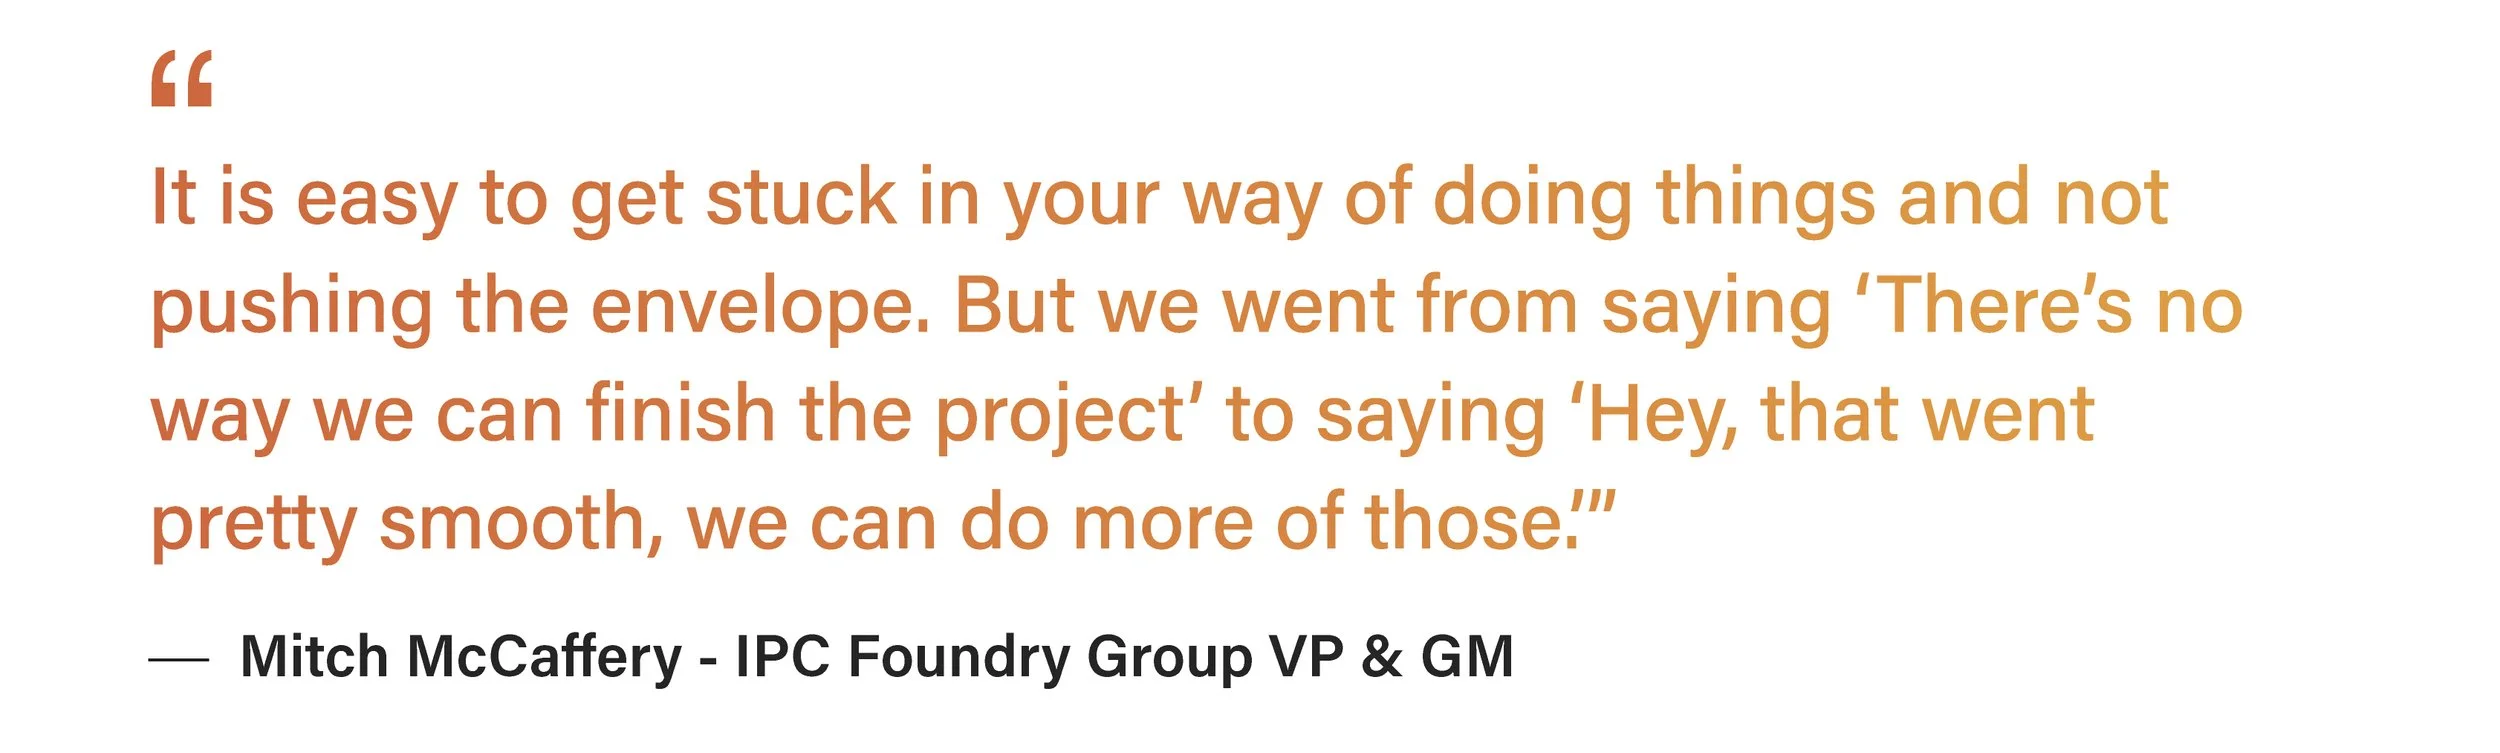
During our initial meeting, some doubts surfaced about whether we could take on the project in a reasonable timeline, VP & GM Mitch McCaffery responded with confidence:
“Look, this is going to be challenging, but we can do this. We have over 100 years of cumulative foundry experience in this room & the systems and facilities to support it. We have the knowledge & experience to succeed."
This kickstarted the team. The conversation shifted from apprehension to strategy and collaboration—what would it take to make it happen? A production plan started to form. We mapped out the timeline, assembled a quote, and began exploring how 3D printing would help us outpace the competition.
How 3D Printing Cuts Casting Lead Times
As a part of pre-production at IPC, we always aim to put together the most streamlined and cost-effective production plan possible. For this project, 3D printing truly shone.
As mentioned in our introduction, traditional investment casting uses tooling to create wax patterns. This adds expense and a significant amount of time to the production cycle (recall that the competitors required three additional weeks to prepare tooling). However, with 3D printing, we could bypass tooling entirely and print wax patterns and gating systems directly from a digital model. Depending on the project, this can dramatically reduce both cost and lead time.
During quoting and pre-production, it quickly became clear: this was a slam-dunk project for a 3D print. Despite the large casting size, we could print a full-scale pattern in just 24 hours. With our in-house print farm operating at full capacity, we were able to produce several patterns in tandem and make on-the-fly adjustments as needed. Our engineering team validated the 3D model and successfully printed a demo in just one day.
With a solid plan in place from engineering, production, and maintenance, we quoted the customer an 8-week turnaround, essentially cutting the competitor's time in half.
Our sales team was the direct line of contact with the customer. As part of the quoting process, they pitched our production plan, with 3D printing and its reduced turnaround time as the focal point.
Here's the sales team on this exchange:
"Their idea of casting was, you've got to buy expensive tooling up front, and then you've got to pay for castings. Educating them on a rapid prototyping process that would speed up lead times and cut their overall costs made a big impact. Their engineer had never really bought castings before, so we took the time to show him his options outside of sand or traditional investment casting…
The effort we put into pre-production helped us downstream, but more importantly, it built trust... The lead time was a big factor, but so was showing up with a clear plan: 'Here's how we'll hit your timeline. Here's when you'll see printed patterns. Here's when to expect a first article.' It really instilled confidence in them."
The upfront planning, our clear communication, and the rapid turnaround made possible by 3D printing helped us win the project. We hit the ground running and would soon deliver exactly as promised.
A Timelapse of the 3D Print.
Troubleshooting & Teamwork
First Articles
A significant amount of effort goes into producing an up-to-spec first article. Let’s start by taking a look at printing the patterns. From there, we’ll highlight the work we did throughout other parts of the casting process to achieve a high-quality part and on-time delivery.
3D Printed Models
We mentioned before that this was a big part. It was so big, in fact, that we had to print it in two sections and then stitch the parts together.
Here’s our engineering department on that:
“It was bigger than the build volume than we were able to do. Our printers are fairly large, but this was just so long that it wasn't going to fit in any orientation on the build plate.
So, we printed them in two pieces… it's got two holes that we actually put dowels in in order to line those up perfectly, and then glue that section together. Leaving you with one solid part.”
(See below for reference)

A 3D render of the part. Notice the small holes referenced by our team.
Locking Down the Pattern
During 3D printing, a common failure point on prints comes from overhangs; these are points of the model that extend outward without a supporting base beneath. The team worked with several orientations to minimize overhangs and printing failure points. Eventually, they settled on a print position that would consistently keep parts on-spec by reducing the amount of overhangs and by adding a little bit of extra material for the machining that the parts would undergo later in production.
Here’s engineering again on that addition:
“We worked with the customer and compromised on adding a little bit of extra machine stock to make sure the part would always be up to spec. After that, the print came out perfect in every way that we needed it to, and any slight imperfection was able to be machined away.”
Each pattern took almost exactly 24 hours to complete, so we printed these parts around the clock for the first several weeks of the production window, and even purchased an additional printer to ensure that we met the deadline. With a little trial and error, we had patterns fit for full production.

A 3D Printed Pattern.
Gating
An unsung hero of the casting process, is using solidification modeling to optimize gating, reduce casting defects, and increase overall manufacturability. Solidification modeling utilizes computer simulations to determine how metal flows through the gating systems and eventually solidifies as a finished part.
Our initial print run did not meet our expectations, so rather than upgrading and keeping with the same process, we made some tweaks based on what our solidification modeling was telling us and it resulted in a significant improvement. 3D printing came in clutch for these revisions:
Here's our engineering team on the flexibility 3D-printing offers:
"If one thing doesn't go right, the in-house 3D printing allows us to have something else to try almost immediately. Along with the experience that our team members have, we can get it right in one or two iterations of prototyping."
The refined gating worked like a charm and we were able to print it quickly. The castings had very minimal problems and we learned which areas we need to pay a bit more attention to during production. Any remaining issues were able to be cleaned up with process refinement and finishing work. The first articles were sent to the customer for approval while we continued to print patterns for full production.
Additional Work Around The Foundry
As mentioned earlier in the article, our maintenance and production teams worked hard to install the larger furnaces, and ergonomic lifting tools for the heavy molds and castings. This required preventative maintenance and QC checks to ensure we could deliver consistent, quality work.
The production team also had to create a thick enough shell in our dipping rooms to match the weight of the part. Ultimately, settling on a long dip cycle that required approximately 4 days of dipping and drying for every part.
When asked how the team at IPC tackles a unique project like this, our Production team said:
“We just go back to our knowledge base. What can we do with this part that has been successful in others? And then trial and error.... We rely on each other’s experience, and we just got a feel for it, and it became simpler. The more times we did it, the better we got at it.”
A look at the process


From CAD to Casting in 8 Weeks
With the kinks ironed out and proven systems in place, the team at IPC moved forward like clockwork and met the deadline. The breakdown of production looked a little something like this:
Printing Gate and Pattern:
24 hours per part
Dipping Room and Shell Formation:
~ 4 days per part
Metal Pouring and Finishing Work:
~2 days per part
All Parts Completed and Shipped:
8 weeks
We took on a complex project with an exceptionally tight deadline, and delivered, thanks to the speed of 3D printing, the deep expertise of our team, and constant collaboration. Throughout the project timeline, Slack channels and emails were ablaze with progress updates, questions, troubleshooting, and daily successes. Reflecting a team fully bought into the process.

Conclusion
Kickstart Your Production with IPC
At IPC, we know that every project, regardless of scale or complexity, has its own set of challenges. That's why we offer a one-stop shop for all your metalworking needs. From prototyping and 3D printing to casting and machining solutions, you can count on us to deliver exceptional metal parts - right when you need them.
Ready to get started? Contact us today!